- Blog
- How to Organize Your Kitchen Cabinets
How to Organize Your Kitchen Cabinets
Mar 19, 2021
Are you starting to feel the new season-cleaning bug kicking in? The project list can get long fast, and you may be trying to figure out where in your house to begin. If the kitchen is on that list, then we have some great tips to share to organize, optimize and maximize your cabinets and drawers no matter what size your kitchen may be.
From making existing space more functional to rediscovering what’s been hiding in the back of your cabinets, it doesn’t take long to realize why reorganizing and decluttering your kitchen (and just in general) is a worthwhile effort that reaps long-lasting benefits. Being organized means you can see what you actually have, so you’re less likely to buy multiples of things (saving you money and more clutter). You'll save time and effort cooking and meal prepping when you make pots, pans and utensils easy to access. Cleaning up and putting things away will be much easier when everything has a dedicated cabinet or drawer spot for it. Best of all, it’s cathartic ; being more organized gives you a greater sense of control and peace. Feng shui is a real thing!
So if you’re ready to reorganize, here are five steps to help you get there.
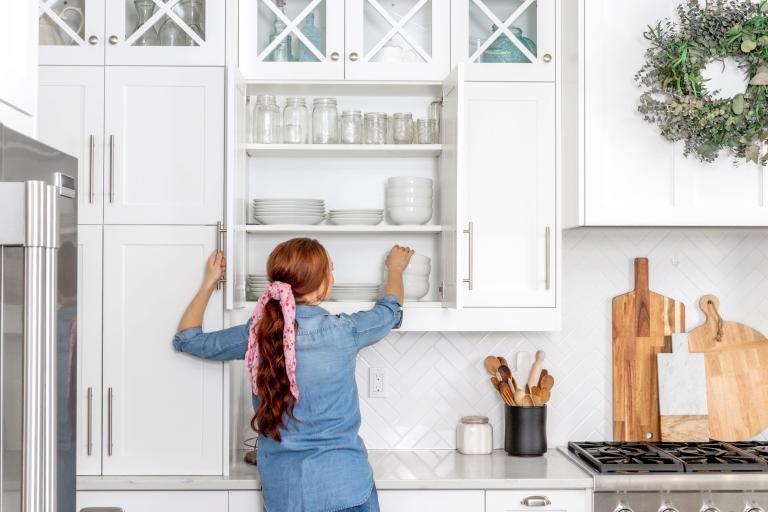
Step 1: Declutter, Donate or Ditch
The first step of any kitchen reorganization project: Empty out your cabinets, drawers and pantry. Unless you’re considering moving items from one cabinet into another (more on that later), you may want to take this one cabinet at a time ; this will help make the project more manageable and you won’t feel overwhelmed right off the bat.
At this point, experts in home organization and decluttering suggest dividing your items into three piles: what you’ll want to keep, what you don’t want to keep but can donate (like if you have duplicates) and what needs to be thrown out. You'll want to do this even before purchasing cabinet storage solutions or trying to rearrange items, because you’ll probably have fewer items than before by using this method.
Step 2: Consider Function and Utilization
Once you’ve figured out what to keep, don’t just put things right back into the cabinets. Take a little time to figure out how you could better organize these items in a way that makes sense for how your household uses the kitchen. The good news here is that there is no right or wrong way to go about this ; your kitchen is different from everyone else’s, so your needs will also be different.
Sure, you may just have a personal preference to keep things where they are, and that’s OK. But in just entertaining the thought of switching things around, you may discover that a new place for certain kitchenware would make much more sense in the long run.
Step 3: Plan How You’ll Arrange Each Cabinet
How exactly you think through this process is completely up to you, but the ultimate goal is to keep each category (e.g., dinnerware) and subcategory (plates, bowls, glassware, etc.) together when you begin putting things back. For example, most people tend to separate cookware from dinnerware in their kitchen cabinets. If you don’t have this setup already, it might be the easiest place to start and then subdivide from there.
In addition, place items you use frequently toward the front of the cabinet and on a lower shelf for easy access ; other items you use sporadically or for special occasions can be stored safely in the back.
Step 4: Get Creative with Space and Storage Solutions
Utilizing every inch of space that you can is key to great organization. This is particularly important when you have a small kitchen or very little cabinet space. This may take a little creativity on your part (hello, Pinterest) but maximizing your storage options in this way will allow you to store more items than before, yet still keep them tidy.
Some clever (and inexpensive) ideas include:
Adding a shelf or hooks on the inside of a cabinet door to store small items like spices and cleaning materials
Using stackable shelves, which allow you to go vertical and double your storage
Utilizing your wall space to free up your cabinet. Use removable hooks to hang and display frequently used cookware or cooking utensils
Step 5: Maintain the Organization
Congratulations everything is organized! Dinnerware and glassware are neatly stacked, pantry staples are grouped, what you don’t use anymore has been eliminated and everything is now in its proper place. Now comes the most important step of all: maintaining your new system, so you don’t undo all of your hard work.
And even though it’s important, it’s also as easy as making that extra bit of effort every time you put something away to do it the right way. Then whether it’s once a month, once a year or somewhere in between, take inventory on your upkeep from time to time. Those extra moments pay off in the long run in keeping your kitchen looking amazing.
It’s Like a Whole New Kitchen and State of Mind
Another thing you could gain from your hard work is something you can’t see, but rather you’ll experience internally: peace of mind. It’s likely that you’ll feel more accomplished, in control and mentally Zen knowing you saw your project through, your drinkware is all in one place, your plates are all in another and so on. It’s also good motivation to keep your spring cleaning going!
A final thought: Throughout the kitchen decluttering process in particular, you may discover the need for a certain kitchen appliance or piece of storage furniture that could enhance your kitchen’s effectiveness and efficiencies even more. Once again, we have a solution: Shop with us at any one of our over 15,000 retailer locations and discover how easily lease-to-own, a flexible alternative to appliance financing, can help make that happen.* Just one more way we're bringing you peace of mind this spring and always!